
At Home Owners Association, we understand the importance of protecting your property from water damage. A waterproofing puddle flange is a critical component in safeguarding your home’s foundation and drainage system.
This guide will walk you through the process of installing a waterproofing puddle flange, ensuring your home remains dry and secure. We’ll cover everything from preparation to the final steps, helping you achieve a professional-quality installation.
What Are Waterproofing Puddle Flanges?
Definition and Purpose
Waterproofing puddle flanges are vital components in effective drainage systems. These devices ensure a watertight and pressure-tight seal where pipes pass through concrete walls of any structure or building. Home Owners Association recognises the importance of these flanges in high-moisture areas like bathrooms and showers.
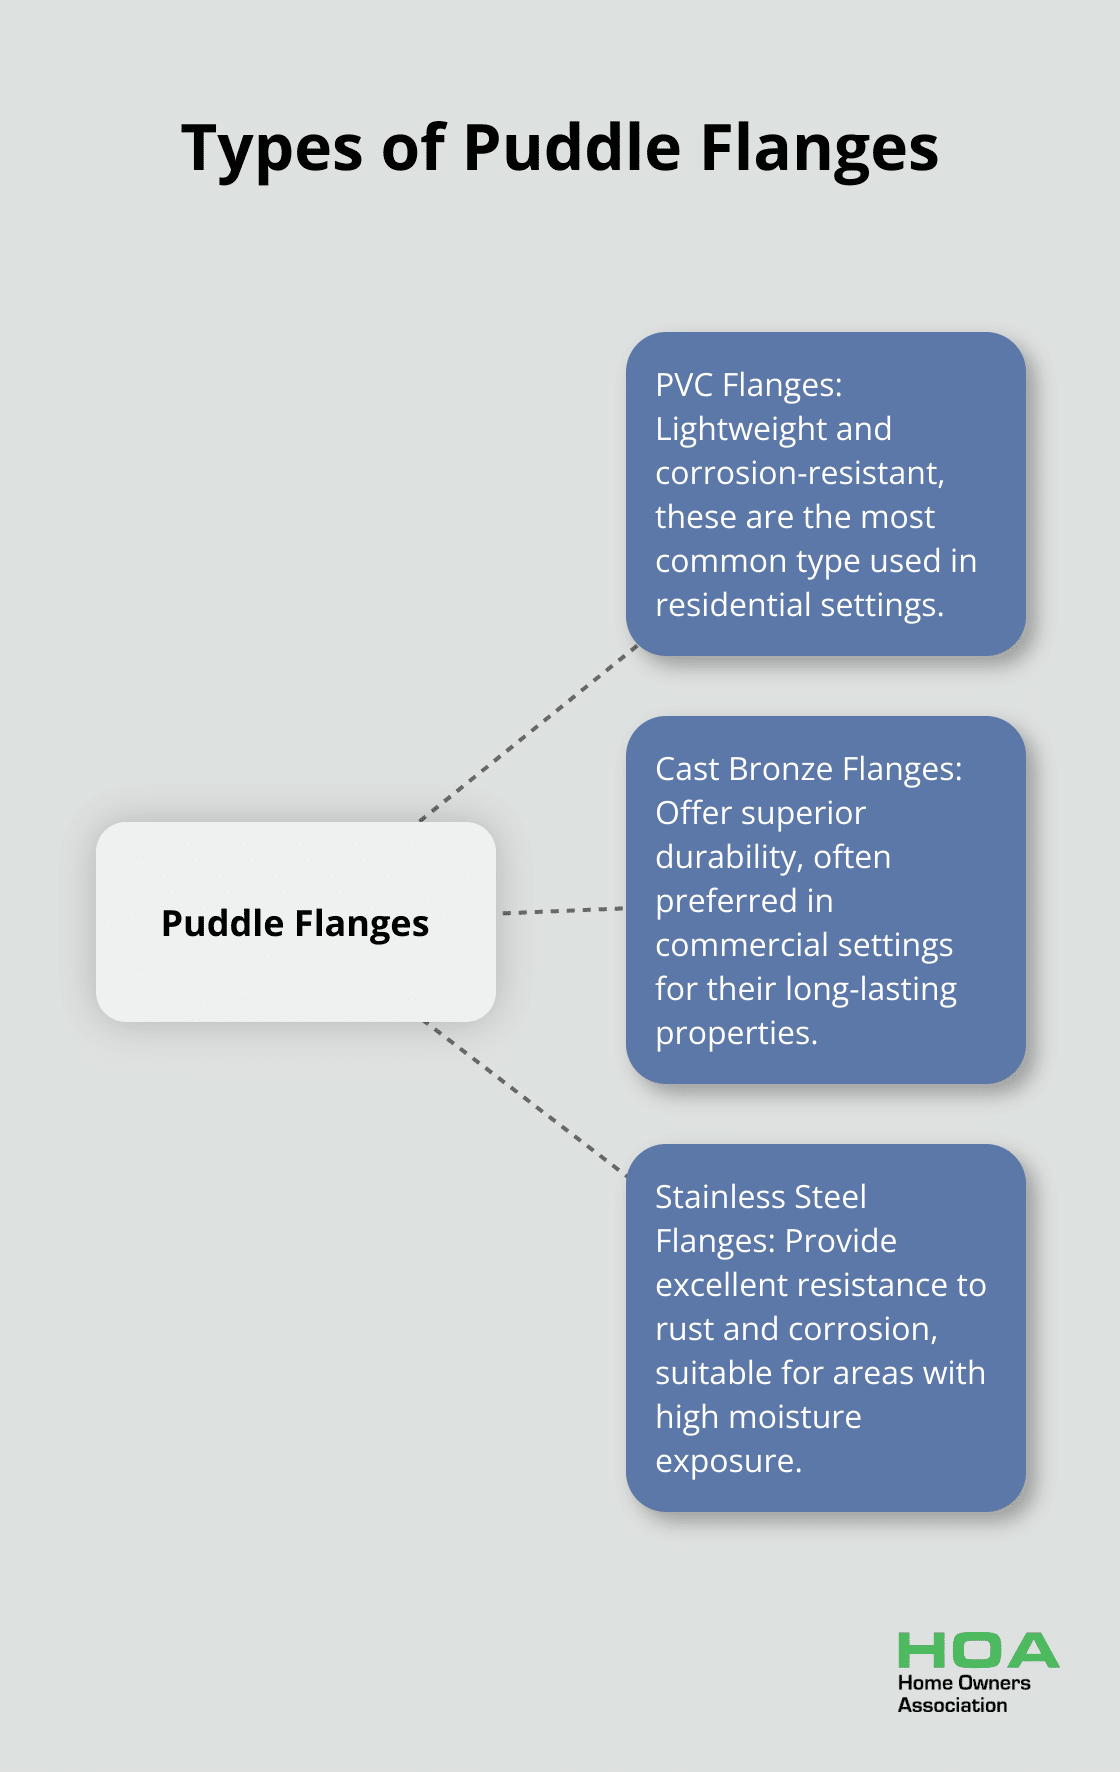
Types of Puddle Flanges
The market offers several types of puddle flanges:
- PVC Flanges: Lightweight and corrosion-resistant, these are the most common.
- Cast Bronze Flanges: Offer superior durability, often preferred in commercial settings.
- Stainless Steel Flanges: Provide excellent resistance to rust and corrosion.
Installation Benefits
The proper installation of a puddle flange maintains the integrity of your home’s waterproofing system. Correct installation significantly reduces the risk of water damage to your property’s foundation and structure. Poor building design, issues with the substrate, and incorrect waterproofing are common factors that contribute to waterproofing failures, according to expert views. The use of puddle flanges can help homeowners avoid costly repairs in the future.
Integration with Waterproofing Systems
Puddle flanges work in conjunction with waterproofing membranes to create a comprehensive moisture barrier. The flange’s large surface area provides an ideal bonding point for the membrane, which ensures a seamless connection between the drainage system and the waterproofed surface. This integration is particularly important in wet areas where Australian Standard AS 3740-2010 mandates specific waterproofing requirements.
Quality and Compliance
Home Owners Association always recommends the use of high-quality puddle flanges that comply with Australian standards. While it might seem tempting to cut corners, investing in proper waterproofing materials and installation can save thousands in potential water damage repairs (not to mention the headache of dealing with water-related issues).
As we move forward, it’s important to understand the preparation required for a successful puddle flange installation. The next section will cover the tools, materials, and safety precautions necessary for this critical task.
Preparing for Puddle Flange Installation
Essential Tools and Materials
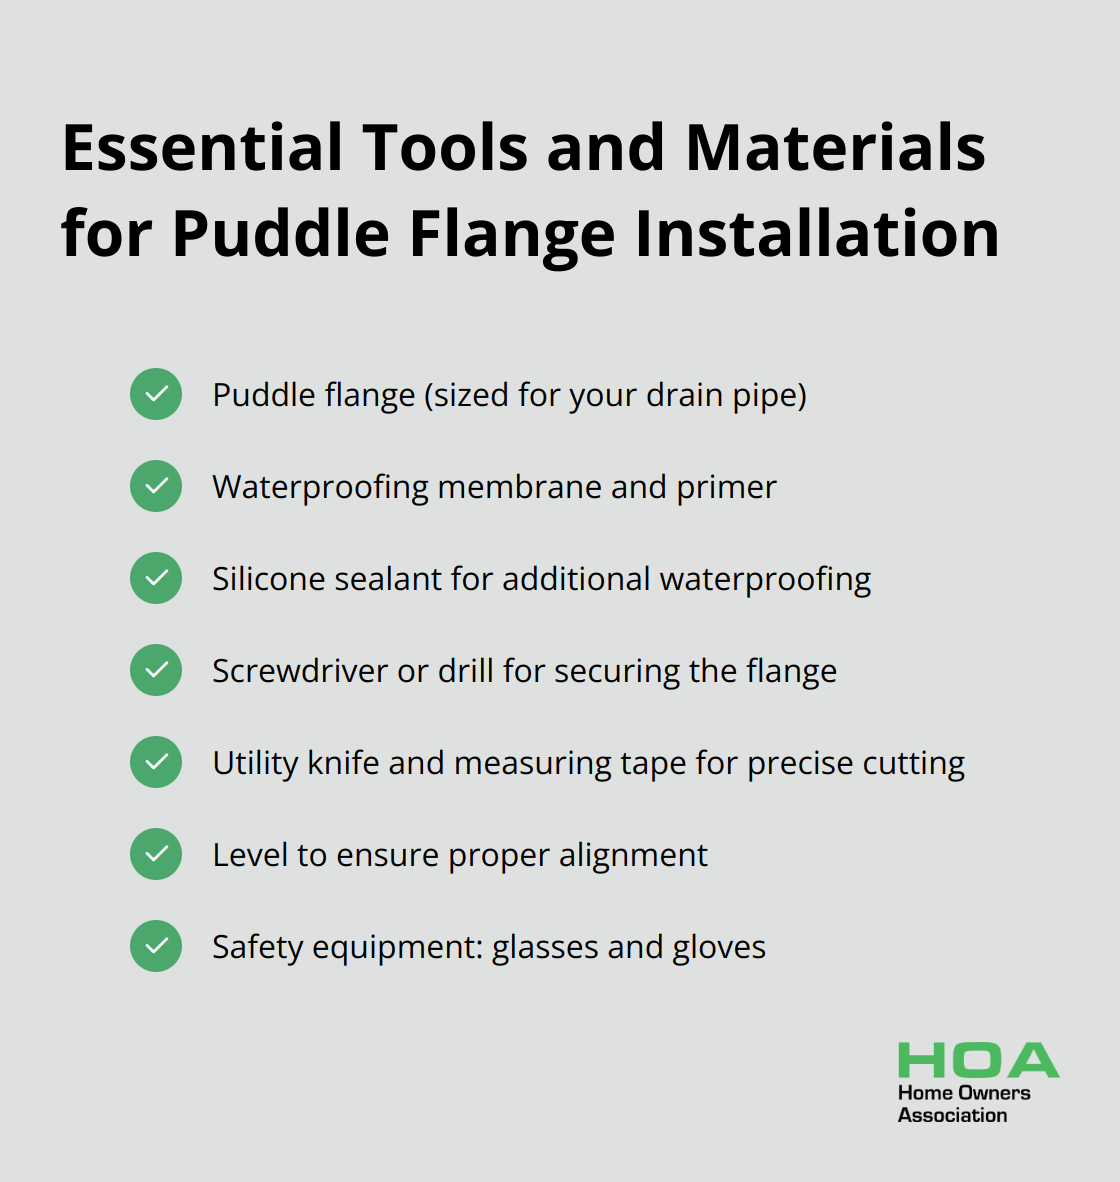
To install a waterproofing puddle flange, you’ll need these items:
- Puddle flange (sized for your drain pipe)
- Waterproofing membrane
- Primer
- Silicone sealant
- Screwdriver or drill
- Utility knife
- Measuring tape
- Level
- Sandpaper
- Clean rags
- Safety glasses and gloves
Select high-quality materials that comply with Australian standards. Inferior products can lead to costly repairs in the future.
Surface Preparation
A clean, smooth surface is vital for a watertight seal. Follow these steps:
- Clean the area around the drain thoroughly.
- Remove old sealant, debris, or loose material.
- Use sandpaper to create a slightly rough surface (this improves membrane adhesion).
- Fill and level any cracks or imperfections in concrete surfaces.
- Check wooden subfloors for structural integrity and absence of rot.
Measure the area carefully, adding an extra 100-200mm around the shower for waterproofing. This extended coverage prevents water ingress beyond the immediate shower zone.
Safety Precautions
While not inherently dangerous, puddle flange installation requires some safety measures:
- Wear safety glasses to protect your eyes from debris.
- Use gloves when handling adhesives and sealants.
- Ensure proper ventilation, especially when using strong-smelling products.
- Cover bathroom fixtures to protect them from dust or accidental damage.
Professional vs. DIY Installation
Consider your skill level before deciding to install a puddle flange yourself. If you lack confidence in your DIY abilities, hiring a professional is often more cost-effective than fixing water damage caused by improper installation.
Pre-Installation Checklist
Before you begin, double-check that you have:
- Chosen the correct flange size for your drain pipe
- Gathered all necessary tools and materials
- Prepared the surface adequately
- Taken appropriate safety precautions
With these preparations complete, you’re set to move on to the actual installation process. The next section will guide you through the step-by-step procedure for installing your waterproofing puddle flange (a task that requires precision and attention to detail).
How to Install a Waterproofing Puddle Flange
Marking and Cutting the Drain Hole
Start by marking the location for your drain hole with precision. Use a measuring tape and level to ensure accuracy. The hole should be slightly larger than the puddle flange’s outer diameter (typically about 5-10mm extra on all sides). This extra space allows for proper fitting and adjustment.
For concrete floors, use a masonry drill bit to create pilot holes around the perimeter of your marked area. Then, use a hammer and chisel to chip away the concrete carefully, creating a smooth, circular opening. For wooden subfloors, a hole saw attachment on your drill will suffice.
Positioning and Securing the Flange
After creating your hole, dry-fit the puddle flange to ensure it sits flush with the surface. If needed, use sandpaper to smooth any rough edges. Apply a bead of silicone sealant around the underside of the flange’s rim for additional waterproofing.
Lower the puddle flange into position carefully, aligning it with your drainage pipe. Use a spirit level to confirm it’s perfectly horizontal. Secure the flange using stainless steel screws, making sure they’re countersunk to maintain a smooth surface for waterproofing.
Waterproofing Application
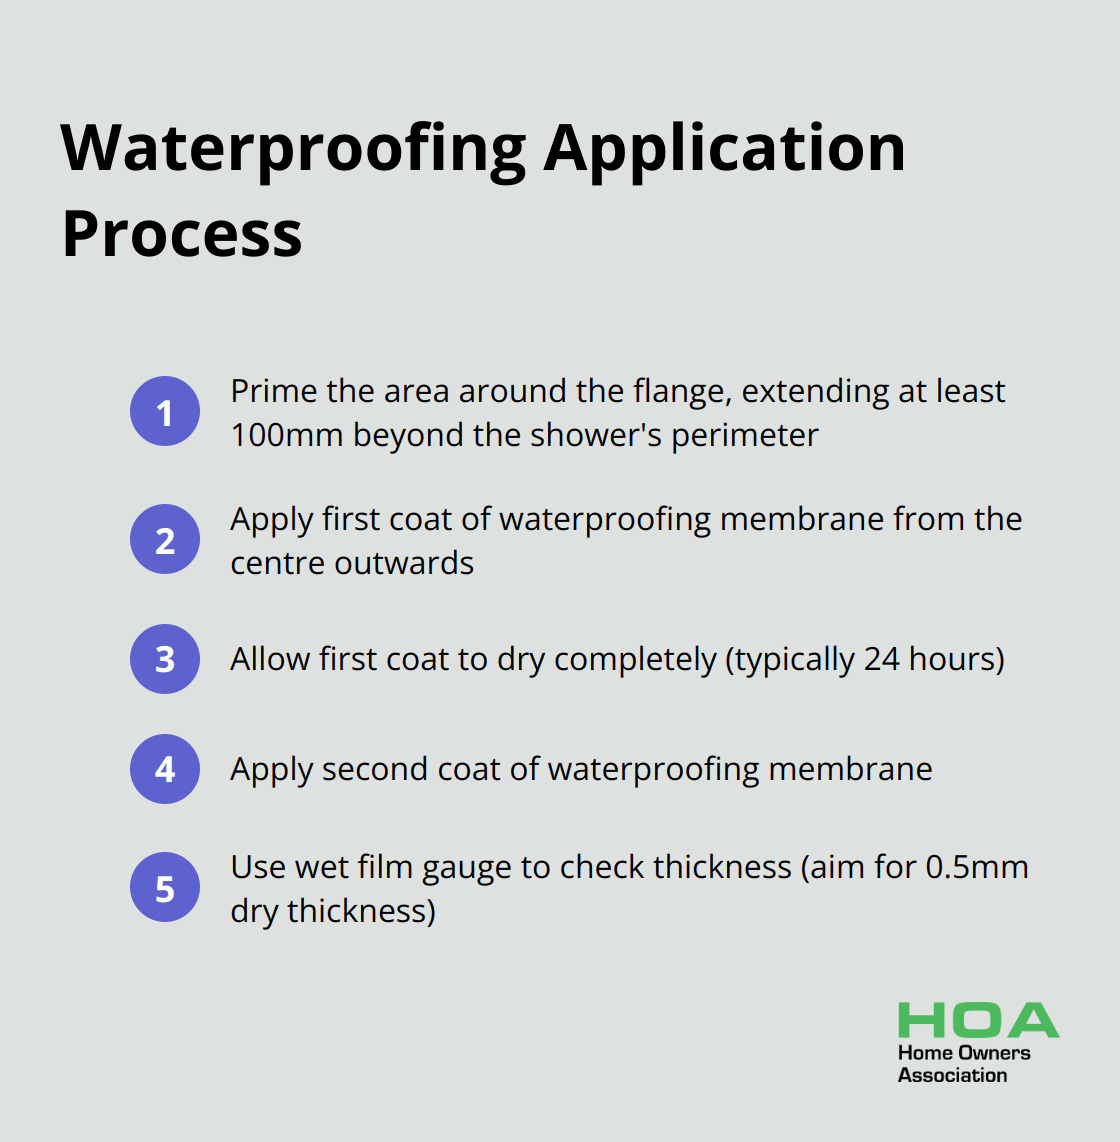
Before applying the waterproofing membrane, prime the area around the flange and extend at least 100mm beyond the shower’s perimeter. This step is essential for proper adhesion.
Once the primer dries, apply your chosen waterproofing membrane. Start from the centre of the puddle flange, work your way outwards in smooth, even strokes. Pay extra attention to the junction where the flange meets the floor, ensuring complete coverage.
Apply at least two coats of membrane, allow each to dry fully before the next application. This process typically takes 24 hours between coats. Use a wet film gauge to check the thickness of your application. Try to achieve a final dry thickness of at least 0.5mm.
Connecting to the Drainage System
After the waterproofing membrane fully cures, connect your puddle flange to the main drainage system. Apply PVC primer to both the flange’s outlet and the drainage pipe, then use PVC cement to create a watertight bond.
For added protection, consider applying a final bead of silicone around the base of the flange where it meets the waterproofing membrane. This extra step can prevent potential water ingress.
Proper installation of floor wastes and puddle flanges is critical to the longevity and effectiveness of your waterproofing system. If you’re unsure about any step in this process, it’s always best to consult with a professional. The cost of expert installation is minimal compared to the potential expense of water damage repairs.
At Home Owners Association, we’ve observed how proper waterproofing protects homes from costly damage. Our members report significant savings on materials for such projects (often recouping their membership fees through discounts on a single renovation). Whether you tackle this project yourself or hire a professional, our resources and expert advice are here to support you every step of the way.
Final Thoughts
A waterproofing puddle flange installation protects homes from costly water damage. We at Home Owners Association have observed how proper waterproofing saves homeowners thousands in potential repairs. Professional installation of this component (while seemingly straightforward) plays a vital role in creating a robust moisture barrier.
Regular inspections maintain the effectiveness of your waterproofing system. Check for wear around the flange area, especially after heavy rains or prolonged use. Clean the drain frequently to prevent blockages that could stress the waterproofing seal.
The success of your waterproofing project depends on quality materials and expertise. We at Home Owners Association provide our Melbourne members with access to trade pricing on top-quality materials and expert advice for home improvement needs. Our goal is to empower homeowners to make informed decisions and achieve successful project outcomes.